
This Tutorial Will Guide you through the complete steps enabling you to make your very own basic inside/out satchel, if you don't understand any of the stages in this tutorial please don't hesitate to ask any questions.
Step 1: Gather Your Ingredients :)
You need approximately 1 Yard of Fabric,
Snippy Scissors,
Dress/Sewing Pins,
A Tape Measure,
Preferably a Sewing Machine but can also be done by hand,
A Pen/Tailors Pencil,
Book for easy sizing of bag, Molly makes Magazine and Ipad or similar size, used for this one x
An Iron


As Pictured Below, you should have a nice neat outline.

Step 3: On top of your already sketched line add an additional 1.5cm minimum all around the edge this will be your seam allowance and then cut neatly the outside. It will look something like this when your finished.

Step 4: Lay your pieces out with patterns facing towards one another. Pin and Get Ready for stitching.

Step 5: Place your fabric under your sewing machine and using a straight stitch, follow the line you sketched around the edge but make sure you leave a 2cm minimum gap between where you start and finish this will allow you pull your fabric inside out. Oh and don't forget your locking stitches to secure your stitching. :)

Step 6: You will then Pull the fabric Inside and out, the same way you do a cushion and slip stitch the 2cm gap and it should look something like this. In need of a good ironing though x First part completed! This will be your lid!

Step 7: We are now to make both the front and the back panel of the bag. Using an item slightly bigger than your Ipad, you want your measurements for the bag to be at least a 1cm bigger than your ipad measurements and this applies to all round your item. I happen to have a Molly Makes Magazine which fits very nicely with my Ipad sized bag flap. Once you have finished with your measurements you repeats Step 2 - 6 again, you do this for both the front and the back panel.

Step 8: Sorry About The Blurry Picture Here! It's hard taking a picture with one hand! Next You need to measure the sides of the bag. So measure the left Side (20cm) Bottom (30cm) and right side (20cm) these are my measurements yours may be slightly different depending on what you use. The total I had was 70cm and I added 5cms for the seam allowance and extra room just In case you need it.

Step 9: Using the measurements of your bag mentioned in step 8 Cut 2 Long Strips measuring approximately 2-3inches in width (If you want it wider, just add extra width) . In my case both strips measure 75cms long.
In the same way you did the front, back and lid panel in step 2-6 you will do the same for these long strips keep your sewing foot sat along the edge of your strips as you sew, this will give you good equal distance all the way round. Make sure your patterns are back to back and stitch all the way around leaving a 2cm gap again. Then pull your fabric inside out till it's all come through. Slightly fiddly as it's long and thin.
You do the same again for the Strap by repeating the above steps, the only difference is making the length longer I used a full width of fabric 110cm's. If you want your strap to be longer adjust the length according to how you want the bag to sit on your body.

Step 10: You should have 5 pieces, 1 Bag Flap, 1 Front and 1 Back Panel, 1 Strap and 1 Centre Support. I think these all need a good Iron Don't you?

Step 11: Wallaa! They've been ironed! and they look so much better The next part is a little bit fiddly. I left the strap out of this picture but it is their, promise.

Step 12: Using the 70cm Centre Support Piece and One of the Front or Back Panels your going to pin as closely to the edge as possible (as pictured), grip with your finger/thumb a long the seam and pin with your other hand. This will be were you sew as close to the edge as you can get.

It will hopefully look like this! Your going to sew exactly where you have pinned and as near to the edge as possible.

Step 13: You may have excess Centre, so heres what to do. Bend it over and Stitch a nice straight line. Don't forget to back stitch to secure. This is a great way to use Bag Hoops if you want to make it extendable but we are doing a very basic version for your convenience. You may need to adjust your tension setting to around 0-1 as the fabric is now quite thick, do this for the other side of the Centre support as well. Try to make they sure they are evenly lengthened and matched on both sides.

Step 14: Stitch along your pinned seam (from step 12), as close to the edge as possible and make sure underneath your bag is nice and straight. Stitch all the way to the bottom and lock in your stitches when you are their. When your approaching a corner get all the way to the end of your straight stitch and as your about to turn, place the needle down into the fabric, lift your foot and then turn your stitching, this covers any gaps in corners etc, it's a good idea to keep your stitching as neat and unclumped as possible as this stitching will be on view. Don't forget you may need a tension setting of 1-2 and make sure you do a Back Stitch at least twice when you get to the end of each line of straight stitch. Go all the way to the end of your line and do a double back stitch, repeat the turning instructions for the last corner, place needle down, release the foot and turn your fabric. Again making sure it's straight and stitch all the way to the end. Secure your stitching with a back stitch and you've finished this step.

Step 15: It should look something like this, this is the inside of the bag.


Step 16: Before We do anything else. We are going to attach the bag flap. Make sure your pattern sits the right way up. Pin the flap on to the back of your bag, as pictured.

Step 17: Secure the Bag Flap with stitching, I ran my sewing machine over this 3 times to give it extra strength, I am not lucky enough to own an industrial strength sewing machine. ;)

Step 18: Attaching the Straps, pin in place. This is really important, when your sewing your straps on. Stitch a full Rectangle/Square were you want you want your bag strap to join and on both sides stitch horizontally and vertically through your stitching, it will look like an X. This gives the bag good strength, to carry all kinds of heavy items without the fear of your bag falling to pieces. Stitch The straps on both sides in the same manner try to make sure they sit equally.

Step 19: The final part is repeating steps 12 and 13 for the front panel. Be very careful when your stitching not to catch underneath as you secure the front, I don't think you want to be unpicking uneccessarily. This is your bag now finished. Feel free to embellish with all sorts of lovely goodies

Admire your work :)
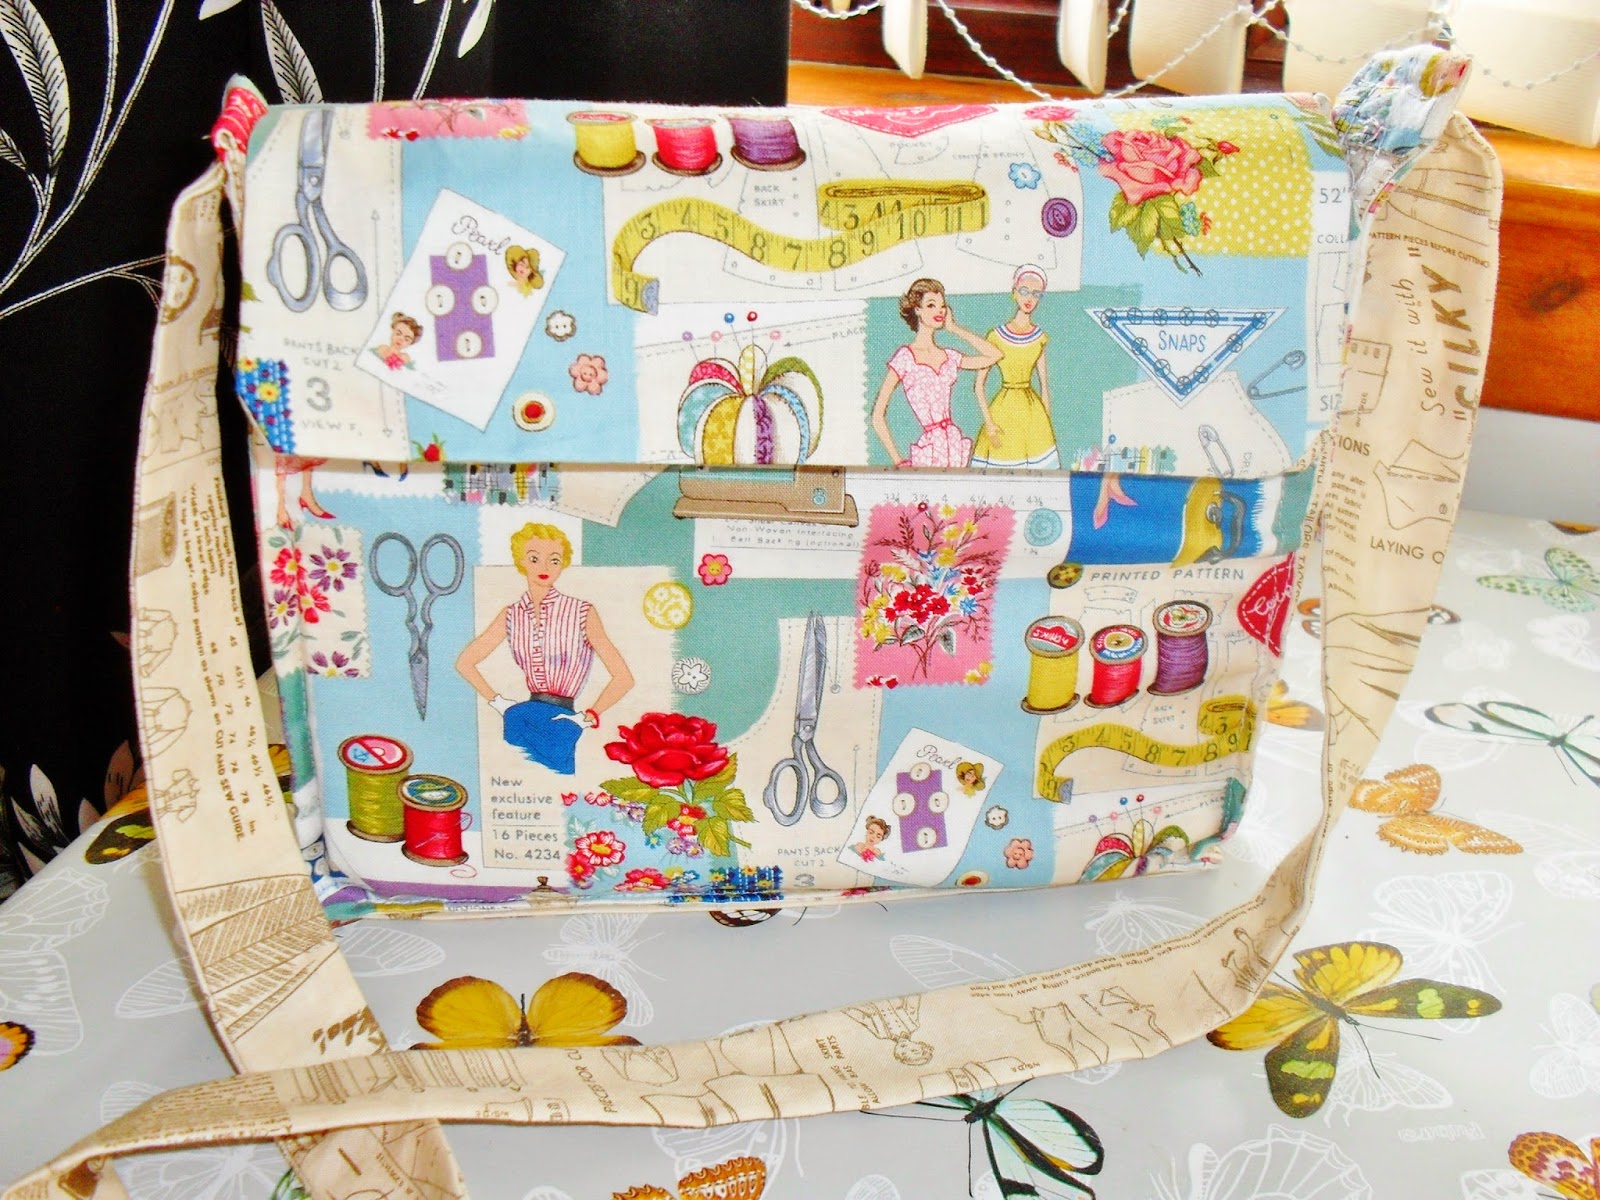

All this beauty needs is button holes and embellishments! Not me! the bag. Share your bag makes with me and give me your best pose ;) I know I look like a Blue Peter Presenter in mine apparently! :) you can email your pictures to and we will place you on my wall of fame followers soon to be introduced email me at patchworkparadise@gmail.com or visiting me on facebook.

Love all the tutorials, much easier to find with them all in the same place. I usually use my phone to view them and Facebook doesn't always cooperate! Will definately be giving this a go at some point!
ReplyDelete